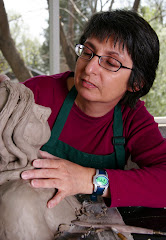
I'm an artist-in-the-schools and have been fortunate enough to be hired by two schools very recently. When a school contacts me, through the annual Cultural Arts Festival in Wake County, NC, for example, I meet with the cultural arts representative and as many other people involved--art and classroom teachers, to hear their wishes. As a former biologist/anthropologist, I like to integrate our clay workshops and residencies with classroom studies, if possible or desired. We made animals and coral reefs at one school-- more on that soon.
At another school, three classes of third graders are studying flowers and pollination. The idea was a legacy project (a gift from a grade level that stays with the school). We also wanted to include students from three Special Programs classes, grades pre-K through 5. So the project had to be BIG.
An image came to mind immediately, but I still spent some time researching. For example, bees were to be involved. So I looked up the preferred flowers of bees. In class, we discussed the symbiotic relationship between bees and flowers. What bees like and why--one thing is easy access--the bee has to be able to get in and out of the flower without too much trouble. (My favorite anomaly is the snap dragon, where the bee's heavy body opens the lower lip of the flower so the insect doesn't get stuck.)
I came up with sunflowers--they have large faces and lots of parts so each student would have plenty to do. As a bonus, the tall straight stem of the sunflower means we could represent it well as a totem.
Since I like to mull (neurose?) over things, my "well-planned" project evolved as we went along. Hey, as I age and (hopefully) gain wisdom, I am learning to keep my options open. This is art, after all!
Halfway into the project we gave the students the option of giving the flowers human faces. They loved the idea. This necessitated ordering more glazes and, as long as I was doing that, brought up the idea of glazing the flowers colors other than shades of yellow.
Looking at colors available commercially, I made a few suggestions. Then Miss Ruby, the wonderful lady who helps out at the school, was my right hand woman and is now a certified clay artist herself, brought in a greeting card with images in those very colors. That closed the deal.
But I get ahead of myself. Once we got all of the parts made and semi-assembled, I brought almost everything back to my studio. Students made a lot of extra parts, including petals and bees, so I'd have options when I got everything to the studio.
It took two van loads! Needless to say, every horizontal space in my studio was crammed--including tables, the slab roller and the space under the tables.
Right now, everything is assembled, I have a few cleared out spaces in my studio, and flower parts are drying in preparation for the kiln. Here are some photos:
One of three big, happy flowers, adorned with friendly bees. Third grade students made the petals, face parts and bees. They also added texture. I tried to share the wealth of work among as many students as possible--one student made an upper eyelid, another a lower, one a left nostril, another a right--you get the idea. They got a pretty advanced lesson in sculpting a portrait!
Special Programs students made any lady bugs you see on the flower faces and stems (see next post). I rolled out the slab for the face and put the pieces together.

Another big flower. Pretty cool, huh? I'll have to go back and measure them, but off the top of my head, they are probably 15-18 inches in diameter.
Once they were firm enough to handle, I flipped them over and added a hollow clay tube and internal supports. The hollow clay pipe will house a metal pole when the flowers are installed. The flowers had to dry a bit more inside, then I scored and added slip to areas to which the back would be attached:
This process involved keeping some parts wet by spraying and covering them, while letting other parts dry out. Timing is everything!
Below is the back of a flower, documenting the class, date, and names of the artists. I also added the names of the teachers of the Special Programs classes. I plan to write something up with the names of all of the students and adults involved, for the school's use. There just wasn't enough room on the back of the flowers for all of the names!
Wet paper towels around the flower back are keeping the backs of the petals from drying out too fast. The hole in the back of the flower will allow us to secure the flower head to internal metal supports.
Once this side firmed up a bit, I flipped the flower back so it was face up, touched up things and added the rest of the petals.
To be continued.....


